Mobile Form Creation

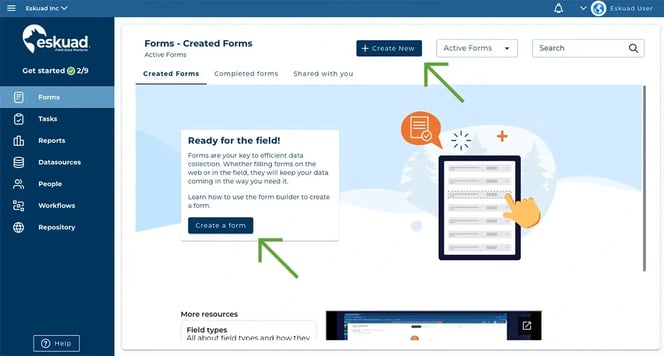
- Accessing the Form Builder: To create a form, start by navigating to the form builder. You can do this by going to the forms menu and clicking the "Create New +" button.
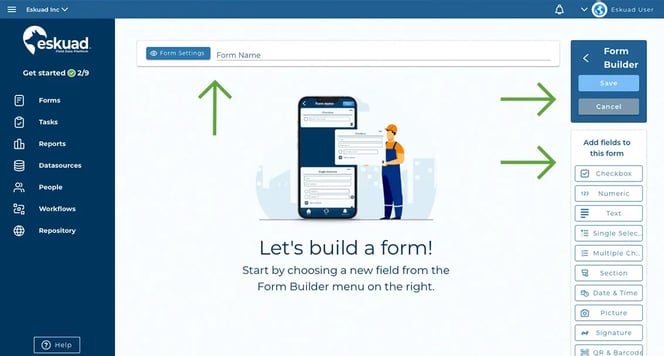
- Form Builder Overview: This is your form builder. There are 2 key elements: At the top, you will find form settings, which include the form's name. It's a good practice to begin by giving your form a name. On the right side, you have all of the different types of fields that can be used to customize your form.
Form Settings:
-
- Form Title- The title of your form. This is what the users who will be filling out the form will see
- Form Visibility- Configure which users have access to the form
- Data Visibility- Configure which users can view the data collected with the form
- Geolocation- Option to automatically collect the geolocation when the form is saved
- Report Name- Option to name the backup report based on the data that is collected with your form

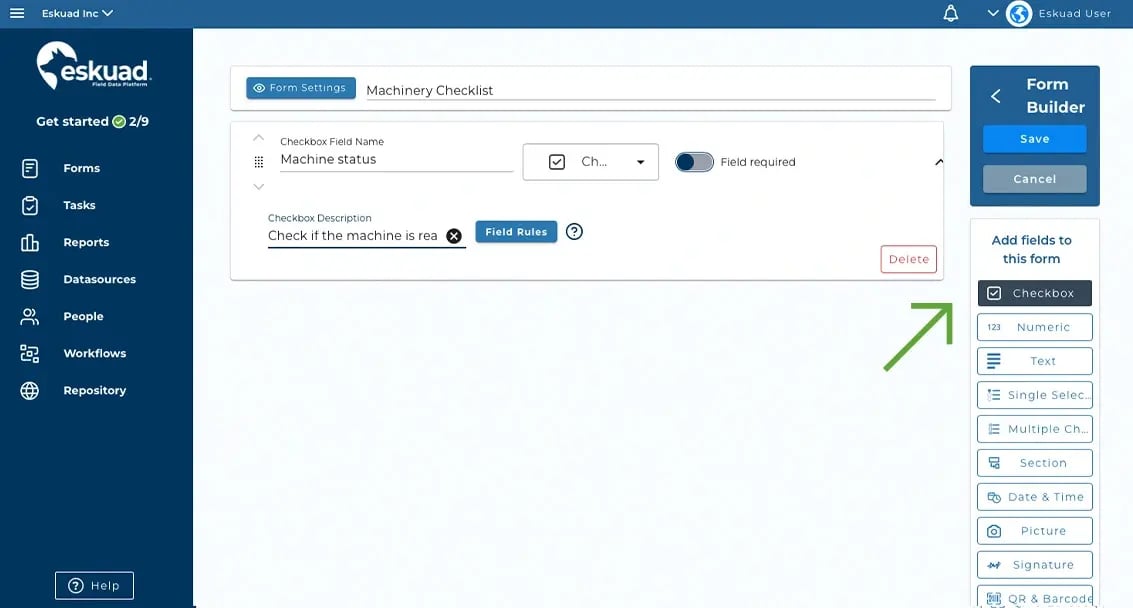
- Inserting Fields: When you click one of the field buttons on the right, it will appear in the form builder. You can then provide it with a title and an optional description. Both the title and description will be visible when someone fills out the form. Think of the title as the main piece of information, and the description as additional context for the person filling out the form. You can find more information about all the different field types here.
Rearranging Fields
When you create the "fields" in your form, you can drag them to the position you want and what suits you and your squad. To do this: left-click, hold, and move/drag to your desired location on the form.
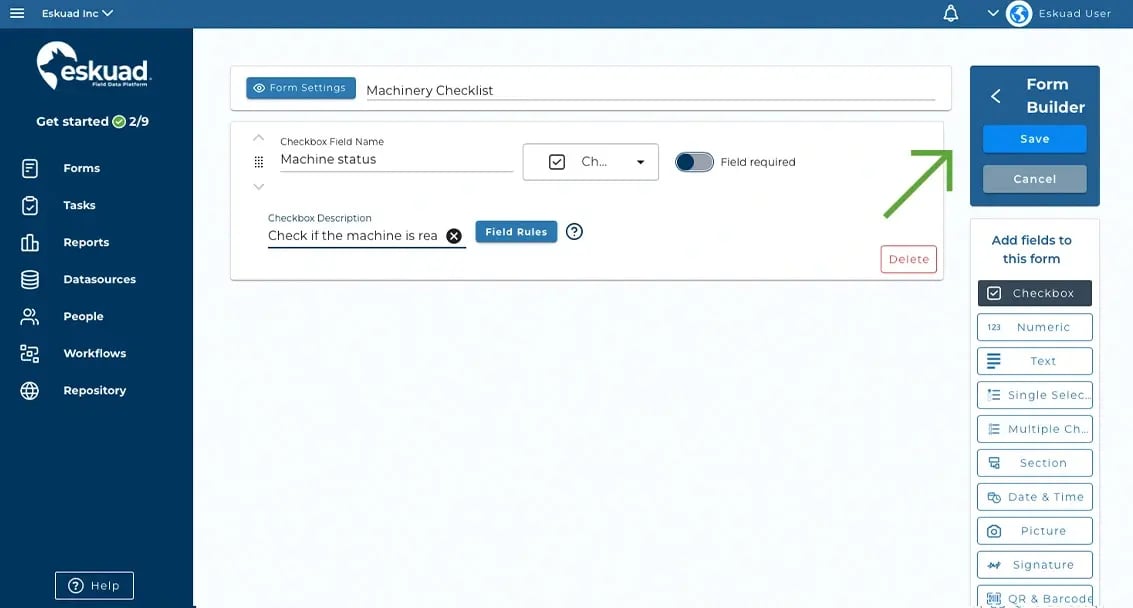
- Review and Save: After you've added all the necessary fields, review your form to ensure it looks the way you want it to. Then, click "Save." This action will return you to the forms menu, where you can see all the forms you've created.
Editing, and Cloning a Form
Editing Forms
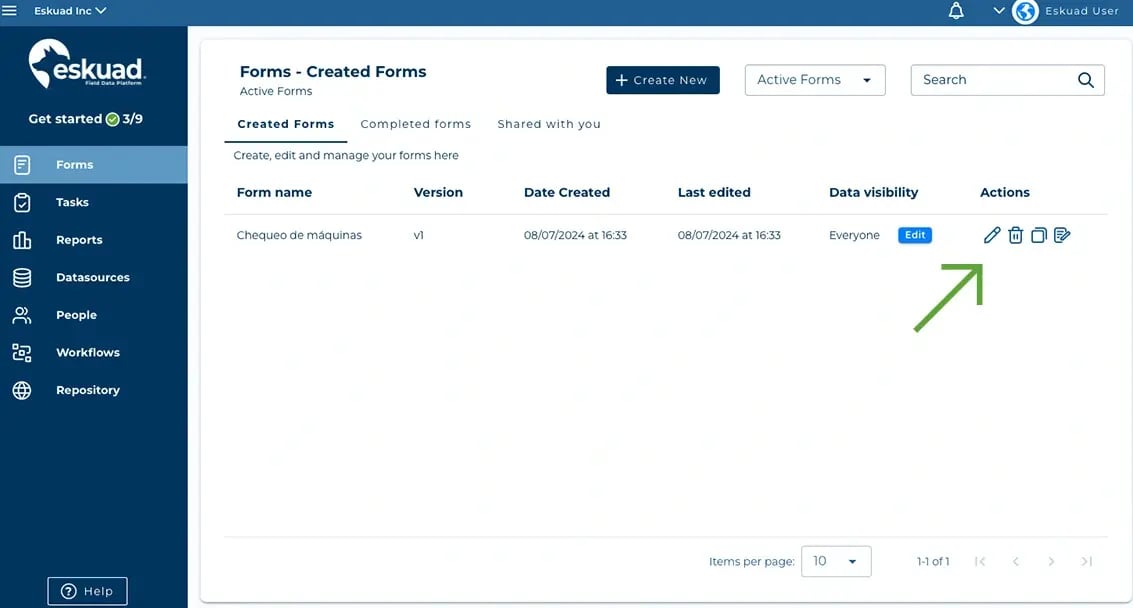
If you wish to edit a form, simply click the pen icon in the form table. This will take you back to the form builder, where you can make any necessary changes. Once your edits are saved, they are automatically published to all users who have access.
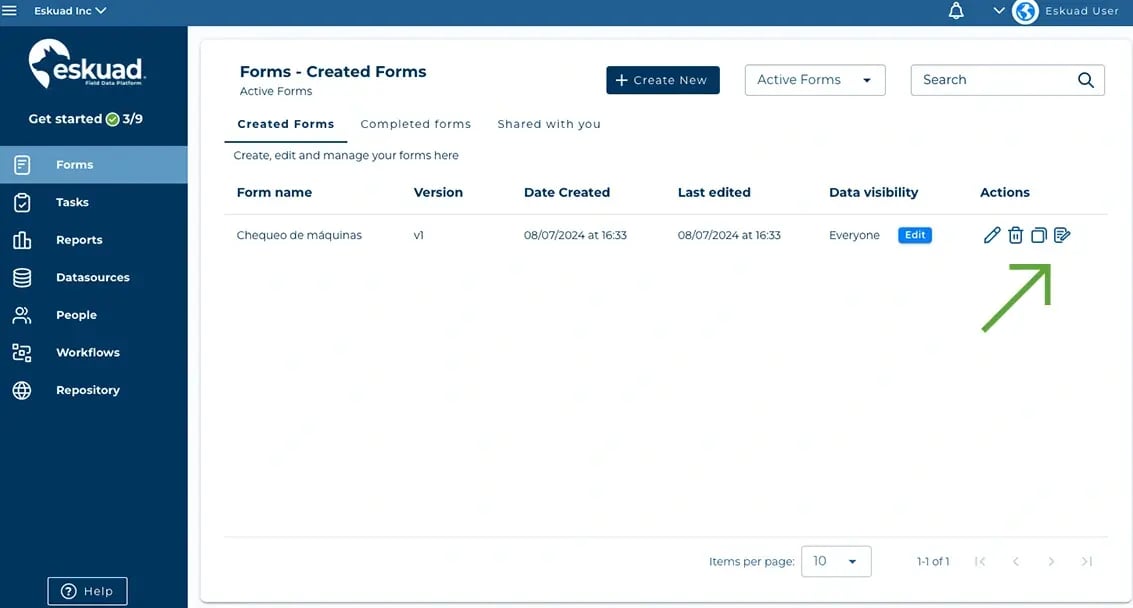
Once a form is created in the main tab, all the forms created will appear and you can clone them at any time. A copy will be created with the same fields created, this is ideal for creating forms similar in content and structure, but which also have differentiating changes, whether by area, user, machine, etc.
Create a Form in the App
Inside the app select "+Form"
Title, Geolocation, and Required Fields
Click "New Field" to add a new field
Select from the list of fields. See above for field definitions.
You can save forms as necessary.
You can then either create a new form and return to the form library.
Click on the one of the forms to view and enter data


